In this article, I’m going to show you how to get a Windows RDP for free by following a few simple steps. RDP (Remote Desktop Protocol) allows users to remotely connect to, control, and operate a computer from another location.
It provides a separate interface, similar to your main computer, but any activity performed on the RDP is not shown on your local device. RDP is commonly used for working from home, remote administration, and accessing work computers from anywhere.
Follow these steps to get a Windows RDP for free:
Step 1:
Create a new Gmail account that you haven’t used before. Then, go to Google, search for GitHub, and create a new account there.
Step 2:
Then, click on ‘New Repository.’ Enter the basic information, such as the repository name, and click on ‘Create Repository.’
Step 3:
Open another website called Tailscale and sign up using the GitHub account you created in the previous step. Authorize your GitHub account and complete the basic setup questions. After that, you can skip the introduction.
Step 4:
Go to Settings and click on Keys. Then, generate an auth key and copy it for later use.
Step 5:
Go back to your GitHub account and open Settings. Navigate to Secrets and Variables → Actions. Click on New Repository Secret, paste the copied key into the Secret field, and name it TAILSCALE_AUTH_KEY. Then, click Add Secret.
Step 6:
After completing the above steps, go to the Actions section in your GitHub repository and click on “Set up a workflow yourself.” Open the main file and paste the code provided below.
name: RDP

on:
  workflow_dispatch:

jobs:
  secure-rdp:
	runs-on: windows-latest
	timeout-minutes: 3600

	steps:
  	- name: Configure Core RDP Settings
    	run: |
      	# Enable Remote Desktop and disable Network Level Authentication (if needed)
          Set-ItemProperty -Path 'HKLM:\System\CurrentControlSet\Control\Terminal Server' `
                             -Name "fDenyTSConnections" -Value 0 -Force
          Set-ItemProperty -Path 'HKLM:\System\CurrentControlSet\Control\Terminal Server\WinStations\RDP-Tcp' `
                             -Name "UserAuthentication" -Value 0 -Force
          Set-ItemProperty -Path 'HKLM:\System\CurrentControlSet\Control\Terminal Server\WinStations\RDP-Tcp' `
                             -Name "SecurityLayer" -Value 0 -Force

      	# Remove any existing rule with the same name to avoid duplication
      	netsh advfirewall firewall delete rule name="RDP-Tailscale"

      	# For testing, allow any incoming connection on port 3389
      	netsh advfirewall firewall add rule name="RDP-Tailscale" `
        	dir=in action=allow protocol=TCP localport=3389

      	# (Optional) Restart the Remote Desktop service to ensure changes take effect
          Restart-Service -Name TermService -Force

  	- name: Create RDP User with Secure Password
    	run: |
      	Add-Type -AssemblyName System.Security
      	$charSet = @{
              Upper   = [char[]](65..90)  	# A-Z
              Lower   = [char[]](97..122) 	# a-z
              Number  = [char[]](48..57)  	# 0-9
          	Special = ([char[]](33..47) + [char[]](58..64) +
                         [char[]](91..96) + [char[]](123..126)) # Special characters
      	}
      	$rawPassword = @()
      	$rawPassword += $charSet.Upper | Get-Random -Count 4
      	$rawPassword += $charSet.Lower | Get-Random -Count 4
      	$rawPassword += $charSet.Number | Get-Random -Count 4
      	$rawPassword += $charSet.Special | Get-Random -Count 4
      	$password = -join ($rawPassword | Sort-Object { Get-Random })
      	$securePass = ConvertTo-SecureString $password -AsPlainText -Force
          New-LocalUser -Name "RDP" -Password $securePass -AccountNeverExpires
          Add-LocalGroupMember -Group "Administrators" -Member "RDP"
          Add-LocalGroupMember -Group "Remote Desktop Users" -Member "RDP"

      	echo "RDP_CREDS=User: RDP | Password: $password" >> $env:GITHUB_ENV

      	if (-not (Get-LocalUser -Name "RDP")) {
              Write-Error "User creation failed"
          	exit 1
      	}

  	- name: Install Tailscale
    	run: |
      	$tsUrl = "https://pkgs.tailscale.com/stable/tailscale-setup-1.82.0-amd64.msi"
          $installerPath = "$env:TEMP\tailscale.msi"

          Invoke-WebRequest -Uri $tsUrl -OutFile $installerPath
          Start-Process msiexec.exe -ArgumentList "/i", "`"$installerPath`"", "/quiet", "/norestart" -Wait
      	Remove-Item $installerPath -Force

  	- name: Establish Tailscale Connection
    	run: |
      	# Bring up Tailscale with the provided auth key and set a unique hostname
      	& "$env:ProgramFiles\Tailscale\tailscale.exe" up --authkey=${{ secrets.TAILSCALE_AUTH_KEY }} --hostname=gh-runner-$env:GITHUB_RUN_ID

      	# Wait for Tailscale to assign an IP
      	$tsIP = $null
      	$retries = 0
      	while (-not $tsIP -and $retries -lt 10) {
          	$tsIP = & "$env:ProgramFiles\Tailscale\tailscale.exe" ip -4
              Start-Sleep -Seconds 5
              $retries++
      	}

      	if (-not $tsIP) {
          	Write-Error "Tailscale IP not assigned. Exiting."
          	exit 1
      	}
      	echo "TAILSCALE_IP=$tsIP" >> $env:GITHUB_ENV

  	- name: Verify RDP Accessibility
    	run: |
      	Write-Host "Tailscale IP: $env:TAILSCALE_IP"

      	# Test connectivity using Test-NetConnection against the Tailscale IP on port 3389
      	$testResult = Test-NetConnection -ComputerName $env:TAILSCALE_IP -Port 3389
      	if (-not $testResult.TcpTestSucceeded) {
              Write-Error "TCP connection to RDP port 3389 failed"
          	exit 1
      	}
      	Write-Host "TCP connectivity successful!"

  	- name: Maintain Connection
    	run: |
      	Write-Host "`n=== RDP ACCESS ==="
      	Write-Host "Address: $env:TAILSCALE_IP"
      	Write-Host "Username: RDP"
      	Write-Host "Password: $(echo $env:RDP_CREDS)"
      	Write-Host "==================`n"

      	# Keep runner active indefinitely (or until manually cancelled)
      	while ($true) {
              Write-Host "[$(Get-Date)] RDP Active - Use Ctrl+C in workflow to terminate"
              Start-Sleep -Seconds 300
      	}
Step 7:
After adding the code, click on “Commit Changes.” Then, go to the Actions tab and select the workflow name you created for your RDP. After that, click on “Run Workflow.”
Step 8:
Once the workflow starts, wait a few minutes for it to complete. In the meantime, install Tailscale on your computer. After completion, you will receive your RDP address and password.
Step 9:
After installing Tailscale, log in using the same GitHub or Gmail account you used earlier. Make sure you select the correct account to ensure proper connection.
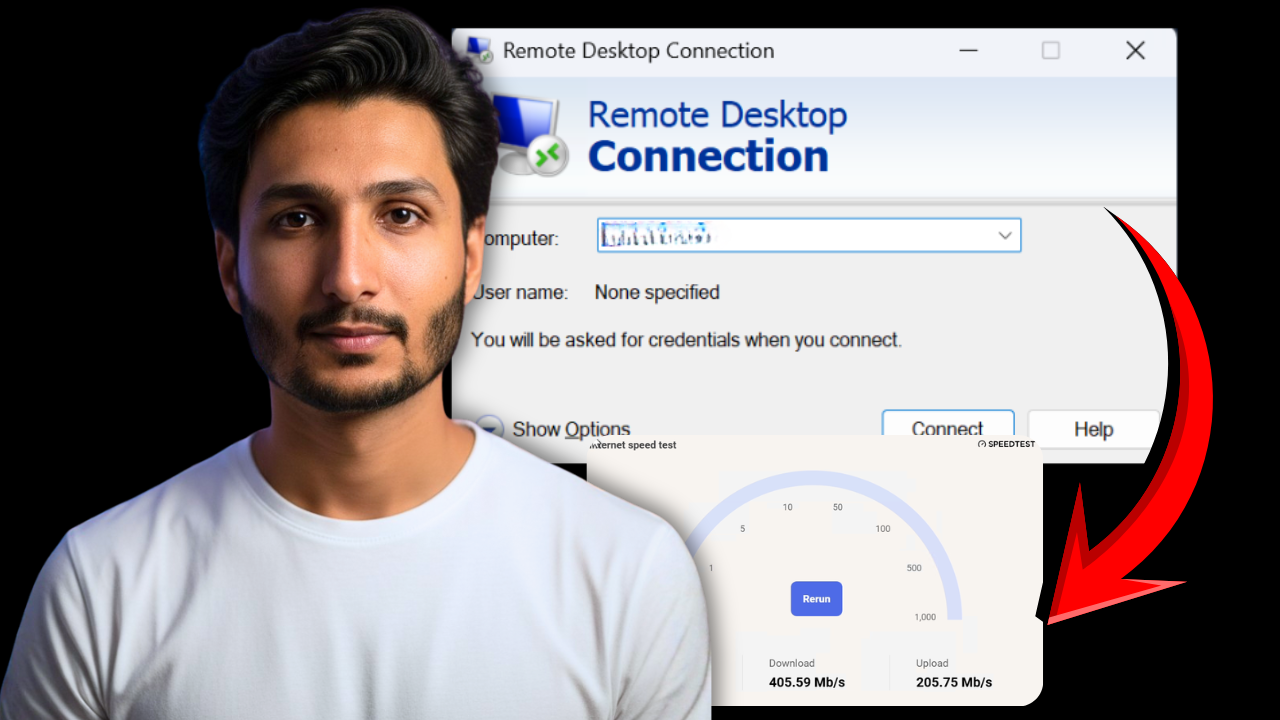
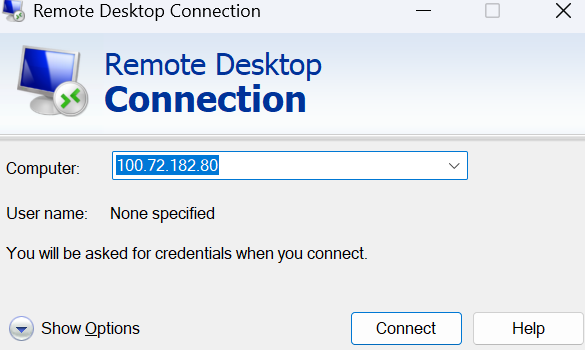
Step 10:
Now, open Remote Desktop on your computer, enter the provided address and password, and connect. You will now have successfully accessed your RDP. I’ve also shared all the steps in detail on my YouTube channel ‘Sadi Tech Pro.’ You can watch the full tutorial there.
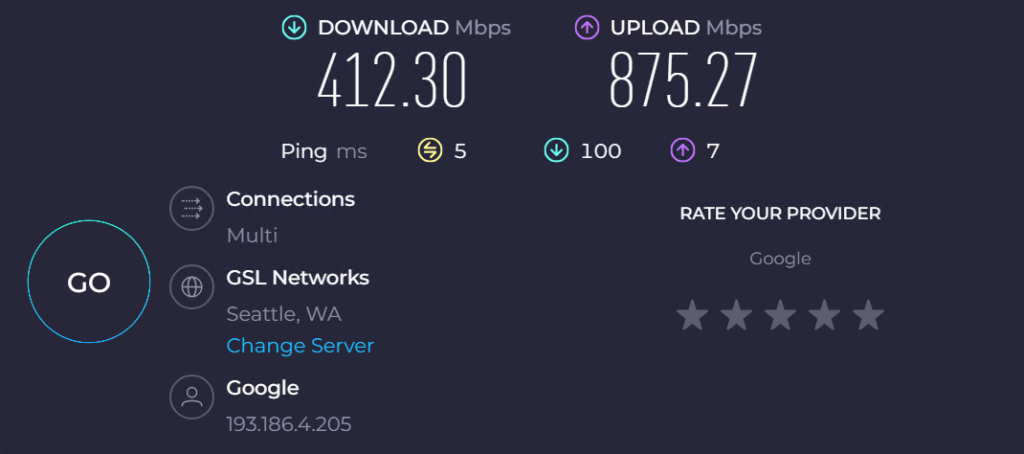
RDP Speed Test Result:
You’re all set! Enjoy using your Windows RDP responsibly. This guide is for educational purposes only, so make sure to follow all official terms and policies.
Important Note: I will update and upload the latest code in this article whenever it becomes available